Friday, January 30, 2015

Simplicity 1261- A Review


*This review is coming from my personal perspective. I have, so far, made two from this pattern in size Medium Adult/Teen. Both of mine were created without the ears, so that part of the process is omitted.*

First off, I hadn't used a paper pattern before this one in, geez, probably ten years. I thought I remembered pretty accurately what I was getting into, so I wasn't too nervous. If you've used lots of patterns before, don't even bother reading this. Just go buy the pattern, make it, and it'll turn out great.

If, however, you're looking into working with patterns as a newb or semi-newb, then please continue reading :)

So, the pieces for the Adult/Teen size are all mostly on one page and the kids sizes on another. The pocket is the only Adult/Teen piece that's on the kids' size paper. This helps keep the whole deal organized. 

When you're starting this project, press the pattern pieces with a warm iron for best results. Make sure to take proper measurements of the person who will be wearing the hoodie. If you don't know how to do that, this tutorial from Sew Mama Sew is great. 

Please please read all the way through the instructions before you start sewing (not just the ones pictured below, the ones inside the package). You might not need it for this pattern, but it's good to make a habit of it. You'll need anywhere from 1 to 3 1/2 yards of fabric, plus a liner for the hood.


I used fleece with a cotton liner, and overall, the pieces fit together very nicely. There are two issues I found using the Adult/Teen Medium pattern that need adjusting. First of all, the sleeves are huge. Not overly long, but just big around. Particularly, the sleeves closest to the wrist and the sleeve cuffs that are added. 

Secondly, the hood is, like, comically large. Ridiculously huge. It's comfortable and wearable and all, but it looks like it was designed to fit over a helmet. That's great if you want a coat for roller blading or whatever, but when that's not your intention, it's quite funny.


Overall, the instructions are easy to work with. When you get to attaching the sleeves, it won't tell you to do both sides, but you need to. I was getting so confused at first about why it didn't want the second sleeve sewn. It does, it just doesn't feel the need to say so.

I also don't really understand why the pocket goes on last. It seems to me that it would be much easier to attach the pocket to the front of the hoodie, then attach the bottom band. I haven't tried it this way yet, so don't quote me on that, but if you try it, let me know how it goes!!

Summary:

- Be sure to read all of the directions before you sew!
- Take measurements properly to ensure the best fit.
- Adjust hood and sleeves to your size

It's pretty simple! Give it a shot. If you do make one, tag @downwithplumes on Instagram so I can see!

Friday, January 23, 2015

Valentine's Must-Haves


Love it or hate it, Valentine's Day is on the horizon! It's time for heart-shaped boxes of candy, dozens of red roses, and those adorable little kids' Valentine's cards, which I firmly believe more adults should hand out.

This time of the year, red and pink are your colors. Hearts, cupids, and little arrows are your patterns. Love is in the air.

With these adorable, handmade, unique items, you can sport your love for V-Day in style.

First up- you can snuggle with your love under this beautiful Valentine's Day blanket! It is 100% handmade with acrylic yarn and is super warm and soft! Get it here from Naomi Ha.


Also for your lovely home, we have this cute and unique heart-shaped wreath from Handmade Moms LLC. It is handmade from a wonderful mother/daughter duo that would love to create something beautiful for your home!


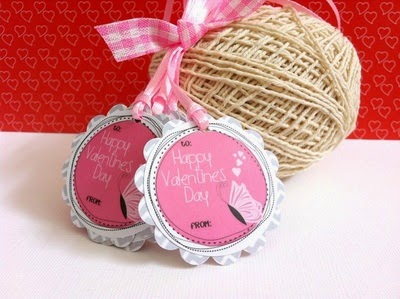
Little cards are great for friends and kids on Valentine's Day, but what about for your bigger gifts? Check out these adorable chevron Valentine's Day gift tags from Adore by Nat! They are hand designed, and 50% of the proceeds go to the Because I am a Girl campaign. Support those girlies and get something cute and useful at the same time!!!


Speaking of girlies.... Sweet Pea Designs by Dee always has the most amazing girls' dresses, and she hasn't disappointed for Valentine's Day! It is made from comfortable cotton and comes in sizes 2T to 5T. See it here.


Also for the girlies, we have this amazingly cute crocheted heart beanie from The Purple Monkey! Available in sizes newborn to twelve months, this hat is great for parties, photo shoots, or even just a day out!


Finally, we've arrived at the items for the ladies. I saved this for last because I couldn't pick just one! Camille's Charms has created these pretty and fun Valentine's Day earrings. We have these tiny and cute Valentine's themed earrings available in three styles, as well as these Sweethearts inspired earrings!


Wednesday, January 21, 2015

Lace Shirt Re-Fashion

I can sense your sense for a theme. You're on to me. I've got a serious love for lace.

Anywho, I had these two shirts- One was a WalMart deal for something like $4, and the other was something I bought long ago that has always been too big.

I decided to turn them into one shirt that's a whole helluva lot cuter than the original two.

Originals:

 Sorry the one is so blurry. #FAIL on me. You get the idea, though. Plain black tank top with lace around the collar. Cute, but dull.

The one on the right is pretty cute, I think, but it's always been like 3 sizes too big for me. Not cute.

So I had to solve that. I had to make something wearable and worth the money I had spent on these shirts.

I cut the bottom off of the shirt on the right and attached it half-way down the tank top on the left.

I cut long triangles of lace, measured to almost the entire length that the sleeve openings are around.


Then I used blanket binding and a snap to make a cute sash, which also has a piece of lace.


Ta-da!! Easy, right? It took me maybe an hour, start to finish.

In case you hadn't noticed, I'm not comfortable in front of the camera.
*Awkward*

Pony tail is the extent of my hair-doing skills.

Stay tuned for more refashions!

<3 Bethany

Friday, January 16, 2015

Crispy Cheesy Chicken

Seriously, you guys? I made the yummiest chicken tonight. I had no plans of blogging my chicken, as it was planned to be just an average meal with nothing unique or special about it. But then... Disaster struck.

No bread crumbs. Profanities raced through my head while I stared into the cupboard. How could I have let this happen?? 

Re-plan the whole meal? Make boring, bread crumb-less chicken? I guess.... WAIT! No! I have Cheez Its! *Shake shake*... There's about three handfuls left. Maybe 30 crackers? That should work for a family of three?

Well, guess WHAT. It did. 

I crumbled up the crackers into a bowl, then added garlic powder, rosemary and parmesan cheese. I mixed it up and used it just like breading on the chicken. 

I didn't have the foresight to take photos of this before I added it to the chicken. This was what was left in the bowl after I had used it on the chicken pieces.

      Since the plan was rosemary and parmesan green beans with cheesy biscuits, I figured it would                                                                               work well.


Uncooked green beans

Fresh out of the oven green beans


Friends- let me tell you a secret. It worked. It worked oh-so-well. 

If you're looking for a healthy/gluten free/dairy free/all natural/locally grown/other food things meal, this is not your recipe. To be completely honest, if that's what you're looking for, I'm just not your girl.

Now, this idea was likely fueled by binge-watching Raising Hope on Netflix. She uses the crumbs (or "dust") from the bottom of cereal and chip bags for her casseroles. 

However, if you're a mother/busy lady/don't mind unhealthy meals once in a while, this is totally for you. The green beans are easy- clean them, add them into a baking dish, shake on some garlic powder and rosemary, then top with grated parmesan. Cook them in the oven on 400 for 20 minutes. *Note- If you like soft green beans, boil them first. These will come out relatively crisp. 

I used the Foster Farms Chicken Breast Tenders, because personally, I like the smaller cuts of chicken. They also cook faster, so #win. I coated the thawed chicken pieces in olive oil, then pressed them into the bowl of crackermagic. I cooked them for about 18 minutes at 400, right next to the green beans (in separate dishes, of course). 

Uncooked, coated chicken

Cooked chicken
It's really easy, quick and yummy! You can likely get everyone in the house to eat veggies if they've got a little cheese on top ;)

Here's the plate, ready to eat!


Featured Crafter- Blueberry Corner Quilts


Whew!! We're back from a long break with a new look and on a new day! Featured Crafter posts will be on Fridays now, which I think will work better. Hubby is home on Mondays and Tuesdays, and man-oh-man does he make it tough to get things done! Plus, now we get the fun of saying Featured Crafter Friday and using #fcf. Wins all around.


Today, we're meeting with Kelly from Blueberry Corner Quilts. She is one of the kindest people I know and creates amazing and colorful items for two shops (we've talked about Pictos & Mimosas here before). She brings the same style and attention to detail to Blueberry Corner and her quilts.


Kelly is a mom of a totally adorable 2 1/2 year old boy, quilter, crocheter, and hand embroiderer. She lives in the San Francisco Bay Area of California, which is a very diverse place with beautiful weather and surroundings. 


Quilting is a very old tradition and there is actually a National Quilting Museum in Kentucky, as well as quilting guilds all around the world. Kelly learned to quilt a little over a year ago, and she hasn't stopped since. 


Once she discovered this love, she decided she must share it with the world. She loves all the possibilities quilting cotton offers, the feel of the fabric on the bolt and the different styles that can be made. Kelly also really enjoys hand embroidering, but hasn't given herself the time to hone her skills in previous years. This year, she's decided that she will spend more time embroidering!


Once Kelly decided to open up Blueberry Corner Quilts, she found that her favorite items to make were baby and crib blankets. They are smaller projects, but are just as special (if not more so) than the full size blankets. They also allow her to do new projects more frequently, which we all know is a huge perk. Many people told Kelly that quilting requires patience, but she's found that the excitement of new projects helps remove the need for patience (no patience required when you're having a blast)!


Blueberry Corner Quilts stands out because of her blend of modern and contemporary styles that use fabrics that are very trendy or new releases. Since quilting takes huge amounts of creativity and heart, Kelly's items are filled with love. Her favorite thing about selling her quilts is knowing that someone else appreciates her quilts and the time, creativity and skill that went into them.


Outside of crafting, Kelly loves photography. Luckily for her, she lives in a fantastic part of the world for taking beautiful nature photos. As time goes on, she hopes to be able to take some photography classes or workshops and expand her hobby further. She's also been enjoying blogging lately! Check it out here


One fun fact about Kelly is that quilting and crocheting are in her blood. One of her great-grandmothers was a quilter (and she still has one of her quilts) and her other great-grandmother was a crocheter (she has some of her projects as well). It seems "the crafty gene" really is a thing!

If you're shopping for a little one, check out Blueberry Corner Quilts' Etsy and Facebook pages. "Like" her page to follow all her newest creations!


Saturday, December 27, 2014

Holiday Fun!

I hope you all had a wonderful holiday season :) 

I've got my house mostly back to normal already. I usually don't by this time, but decided to because I got a stunning heirloom cabinet for Christmas and wanted the space my tree was taking up. Quite the gift, I tell you.

So... Christmas and Hanukkah are over. SAD. However, New Years is right on the horizon!! I'm not one for New Years resolutions, but I'm definitely a fan of ending the year with a bang!

This year, we're doing a New Years Eve Slumber Party! We're going to have great games and prizes going all night long on our Facebook pages! If you're stuck at home while everyone else is out partying (or are choosing to stay home), we'll keep you entertained, and hey, you just might win some freebies!!!

Here is a list of participating shops:


Feel free to "like" the pages ahead of time and turn on notifications :) You do so by hovering your mouse over the "like" button, then clicking "get notifications." 


Let's have fun!! Join us starting at 5:00 pm PST (8:00pm EST) for games, prizes, and a great community!

EDIT---

Here is the full game schedule! Use clickable links above to access these pages :) MANY of these games have prizes!

ALL TIMES ARE PST-
5pm- How many buttons?-Adore by Nat
5:30pm- Who's face-part?- Down with Plumes
6pm- Word Scramble- Camille's Charms
6:30pm- Bingo- Down with Plumes
7pm- Last Comment- BeeBee and Jack
7:30pm- Birthday Game- The Purple Monkey
8pm- Duck Duck Goose- Blueberry Corner Quilts
8:30pm- Word Scramble- BeeBee and Jack
9:30pm- How many gems?- Down with Plumes
10pm- Birthday Game- Waltons Jewelry
10:30pm- Last Comment- The Purple Monkey
11:30- Random Number- Down with Plumes- Final game

Sunday, December 14, 2014

Handmade Hot Hands Hand Warmers

I just finished up the Christmas gifts for my son's preschool teachers and I had to share this with you. It's super simple and makes a great gift.

What you need:

  • Fabric scraps (I used 2 different fabrics but you can stick with just 1 pattern)
  • A piece of cardboard to use as a template (I measured mine to be 3.5" x 4", you can make them any size you'd like, just measure 1/2" extra for your seams)
  • Rice (I used jasmine rice and added some lavender and rosemary that I had gotten out of my garden I cut the rosemary and lavender into little pieces and mixed it into the rice and let it sit for 3 days)
  • A sewing machine (because sewing this by hand would suck)

Using your cardboard template, cut 2 even pieces of fabric. Feel free to trim up the edges so they're fairly even (it doesn't have to be perfect since they're going to end up on the inside, but it helps you sew straight lines if your edges are straight and even)

 With right sides pinned together, start your sewing. Don't forget to leave 1 side completely unsewn so you can flip your bag right side out when you're finished with this step
 Don't forget to zig-zag all the way around the 3 edges you just sewed together to keep them from fraying in the future.
To make sewing your bag closed a little easier and cleaner, I folded down the top 1/4" and ironed the crease in it

 This is what it should look like when you flip it inside out

 Sew the final seam but leave 1/2" at the end to fill it up with your rice

 I couldn't find my funnel so I used a small piece of paper and taped it into a makeshift funnel. Start scooping your rice mixture into your beanbag. Be careful not to overfill because you're going to have to stitch the top closed on your machine when you're finished filling it. I sewed another seam completely across in case the first seam decided to come loose.
Since the rice bags are so small, you only have to heat them for 20-30 seconds and they stay warm for a long while.


I hope you find this tutorial useful and fun :)


Happy Crafting!!

Friday, December 5, 2014

Get Your Kids to Eat Spinich!

I saw this idea on Pinterest originally (who knows where), but the recipe they had suggested using homemade mashed potatoes. I do not roll like that.

I do not have the time, interests, patience, or skill to make homemade mashed potatoes. Boxed mashed potatoes do the trick, and they come in yummy flavors that take zero extra work.

*Note- Again, if you're all about healthy meals every day, this is not an idea for you. If you are, however, looking for a quick and easy way to get your kids to eat some vegetables, this might help :)

I used the mashed potatoes that come in the little packet... They're cheap. I think $.89 at Winco. Anyway, I used the Three Cheese or White Cheese (or something cheese) kind, which are yummy enough on their own.

BUT-- here's where the veggies come in. 

I made the potatoes according the the package, then moved them into a bowl and busted out the ole' trusty mixer. I cut up some spinach into little pieces, then added the spinach to the potatoes and blended it well. I topped it with a bit of shredded cheese, and by the time it was mixed, you could barely taste the spinach!


Yum.

My three-year-old, who says every green food is "stinky" or "yucky", gladly ate every bit of his potatoes. 

Overall, it was a win with the whole family. Next time, I'll use about twice as much spinach, which is about two handfuls or so. 

Enjoy!