Showing posts with label tutorial. Show all posts

Friday, July 24, 2015

Parent's Day

Being a parent can be a thankless and exhausting job. Kids are demanding, and little ones have virtually no respect for asking for something. Lately my four-year-old has just been walking up to me and shouting his needs. Not angrily, or particularly enthusiastically, but certainly very loudly. "MILK." "POP TARTS." I, of course, do not accept his request until it is spoken kindly, with the word "please" in there somewhere, at a normal volume. But still, rude.

So, Parent's Day is this rare unicorn of a holiday that is devoted to (arguably (meaning I have no proof)) the largest population of under-appreciated individuals. And as such, you, as a parent, should enjoy it. If you're reading this and you're not a parent, I can guarantee you know at least one person who is a parent, and something as simple as "Hey, Happy Parent's Day" will be appreciated. 

So, as this holiday is approaching (it's on July 26), and since I am a parent who feels for other parents, I've put together this list (with the help of my fantastic handmade buddies) to give you ideas for fun things to force your children to do with you on Parent's Day, simply for your own crafty happiness.

The owner of Adore by Nat got her promises in writing, you guys. That's where the rest of us have been going wrong. Her child is now bound to his statements. Genius. "Make coffee", you say? Why yes, you can come live with me. But we'll need a notary real quick.


The owner of Shabby Chic Soap Company also found a great way to celebrate the day. The kids get to play in paint and have all kinds of messy fun (which they, of course, must clean up), and she gets a great memento of her kids all cute and little, with little feet. She even wrote you out these detailed instructions for how to make your own! *See photo below for instructions*

Supplies:
Canvas (11x14 works great)
Acrylic Paint

Brush or Sponge
Sealer (paint or spray)
Stencils (optional)
Stamps (optional)
Paint pen or Sharpie (optional)
Newspaper (optional)

Instructions:
1) Make sure to protect your workspace since your little one will have paint on their feet. The easiest way to do this is lay out some newpaper on the floor where you plan on working.
2) Using your brush or sponge, cover one of your little one's hands in paint and help them create a handprint just left of the middle of the canvas.
3) Then cover your little one's feet with paint. To create the "V", lightly press one foot at a time, at an angle on the canvas to the right of the "O" handprint. *NOTE* If you are using a wrapped canvas, do NOT have your child stand on the canvas as it will not support them. It's best to lift the canvas and press it to the foot instead.
4) Next, you want to paint the "L" and "E" on the canvas. You can free hand this, or use stencils. Just note that if you are using stencils, you should wait for the handprint and footprints to be dry before placing the stencil on the canvas to ensure they do not smear.
5) You can finish up by outlining the letters, handprint/footprints or add the date with stamps or painting freehand. Then once all the paint has dried use a sealer to protect your work. We used a spray paint sealer with glitter for a little extra fun.

Our resident bubblegum necklace maker over at Weil'd Hair and Accessories put a fun spin on the day, interviewing her kids with fun questions. Over the years, keep the different interview questions and answers on paper. This way, you can look back and see how much your child has changed, and possibly find a mildly embarrassing (and wildly hilarious) blip to show their first crush/middle school friends/first date to a dance/whoever floats your boat.

From the interwebs, PBS has some great crafts for kids listed here, but my favorite are these recycled plastic bottle flowers. Now, obviously these will take supervision with the younger kids (the plastic edges might be sharp), you could still find yourself with a no-waste, no-death, custom bouquet of flowers you can keep forever.


I may be the only parent that would enjoy making this, but it's too cute not to include. From Parents.com, this little cardboard space ship would be super fun to make, and adorable to display! They're sized for peg dolls, which can be found custom made in many Etsy and Storenvy shops. Again, this will likely take some assistance, because spray paint and small, unsupervised children do not mix. 


From ActivityVillage.Co.Uk, there are a lot of cute ideas, but this clay frame definitely jumped out at me. It's a great gift for more holidays than Parent's Day. It would be great to work on with your kid, but if the child is old enough, they could totally make this without you! This tutorial even calls for air-hardening clay, so you don't even have to help them bake it!


I think you've got a good set of ideas, here. Go forth and conquering crafting with your kids! Enjoy it! You only get one Parent's Day per year- live it up. 


Wednesday, February 4, 2015

Steampunk-esque Necklace Tutorial

I very badly wanted to make this steampunk-esque necklace. I love clock pieces and metallic colors, so this was the perfect project for me. It turned out to be so amazingly easy that I thought I'd put together some quick instructions for you.

Here's what I used to make this neckalce-
- Pliers and snippers
- Chain
- E-6000 adhesive
- Filigree pieces
- Jump rings
- A clasp
- A center for the filigree piece


First, I used E-6000 to attach the rose to the cog, then the cog to the filigree.


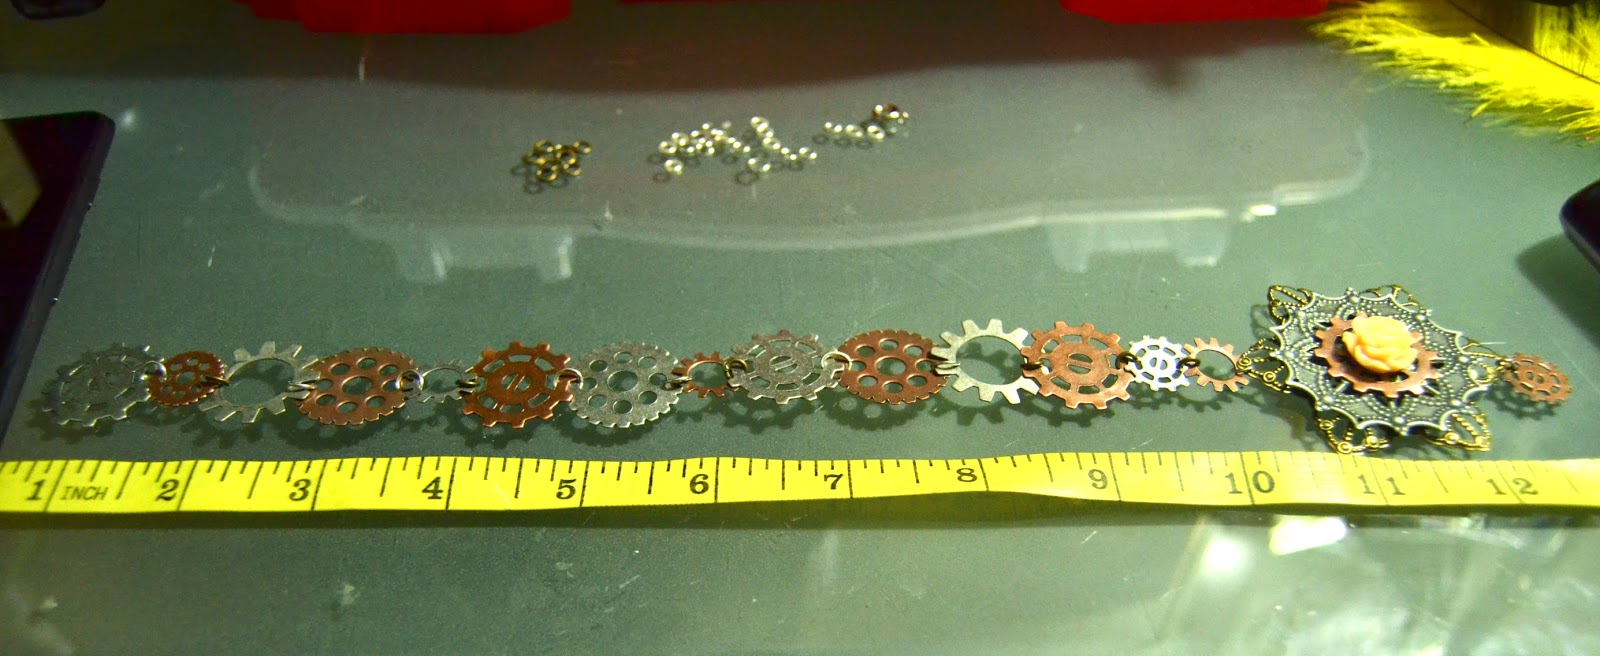
Then, I laid out about 12" of cogs (with the filigree piece), since I was shooting for a 24" necklace. Adjust for the length you'd like your necklace to be.


Open up a jump ring.


Loop the jump ring through the detail in the cogs. Over. And over. And over.


Eventually, you'll have a strand of cogs all linked together. Measure it to be sure you're getting the length you want.


Once you've measured, attach chain at either end with a jump ring, and a clasp in the middle. 

Voila! All done!


Sunday, December 14, 2014

Handmade Hot Hands Hand Warmers

I just finished up the Christmas gifts for my son's preschool teachers and I had to share this with you. It's super simple and makes a great gift.

What you need:

  • Fabric scraps (I used 2 different fabrics but you can stick with just 1 pattern)
  • A piece of cardboard to use as a template (I measured mine to be 3.5" x 4", you can make them any size you'd like, just measure 1/2" extra for your seams)
  • Rice (I used jasmine rice and added some lavender and rosemary that I had gotten out of my garden I cut the rosemary and lavender into little pieces and mixed it into the rice and let it sit for 3 days)
  • A sewing machine (because sewing this by hand would suck)

Using your cardboard template, cut 2 even pieces of fabric. Feel free to trim up the edges so they're fairly even (it doesn't have to be perfect since they're going to end up on the inside, but it helps you sew straight lines if your edges are straight and even)

 With right sides pinned together, start your sewing. Don't forget to leave 1 side completely unsewn so you can flip your bag right side out when you're finished with this step
 Don't forget to zig-zag all the way around the 3 edges you just sewed together to keep them from fraying in the future.
To make sewing your bag closed a little easier and cleaner, I folded down the top 1/4" and ironed the crease in it

 This is what it should look like when you flip it inside out

 Sew the final seam but leave 1/2" at the end to fill it up with your rice

 I couldn't find my funnel so I used a small piece of paper and taped it into a makeshift funnel. Start scooping your rice mixture into your beanbag. Be careful not to overfill because you're going to have to stitch the top closed on your machine when you're finished filling it. I sewed another seam completely across in case the first seam decided to come loose.
Since the rice bags are so small, you only have to heat them for 20-30 seconds and they stay warm for a long while.


I hope you find this tutorial useful and fun :)


Happy Crafting!!

Friday, November 7, 2014

Spruce Up a Plain Tee!

This is a really easy, quick way to brighten up a plain tee shirt!


I found cute tees on clearance for $3 each and couldn't resist, but also couldn't just leave them plain. Here's what I did with one of them-

So, remember in school how you used to cut hearts with folded paper, using the fold of the paper as the center line of the heart? Okay, so apply that logic to a butterfly shape... That's how I cut my butterflies out. Except, obviously, with lace.

It wiggles a bit, so you'll need to clean up the edges before you sew them on. 

Line them up how you want them, then pin them in place. If you overlap them how I did, you'll be able to lift edges and sew them on kind of "together."

This was a really quick, easy project that added something fun and different to my wardrobe, without being expensive or uncomfortable!

Here's my finished project:


Have fun!

Thursday, November 6, 2014

Prom Dress Refashion

Hello crafty friends! I've been doing some much needed cleaning in my closet and came across my prom dress. I've only gotten to wear it twice (I used it one year for a Halloween costume) and it's been sitting in a box for the last 8+ years, so I decided it was time to give it a new look and new life.


To start off, I figured out where I wanted to make my waistline and pinned all around


Next, I cut where my pins were. This dress had boning in it so I had to rip out some seams to get the boning out and be able to cut all the way around the dress. I also cut about an inch above the waistline so that I would be able to fold it over the elastic I was going to use.
Since this dress had multiple layers of fabric, I pinned the layers together and then sewed a straight line the whole way around to secure them together.  Then I zig-zagged over the edge to keep it from fraying.

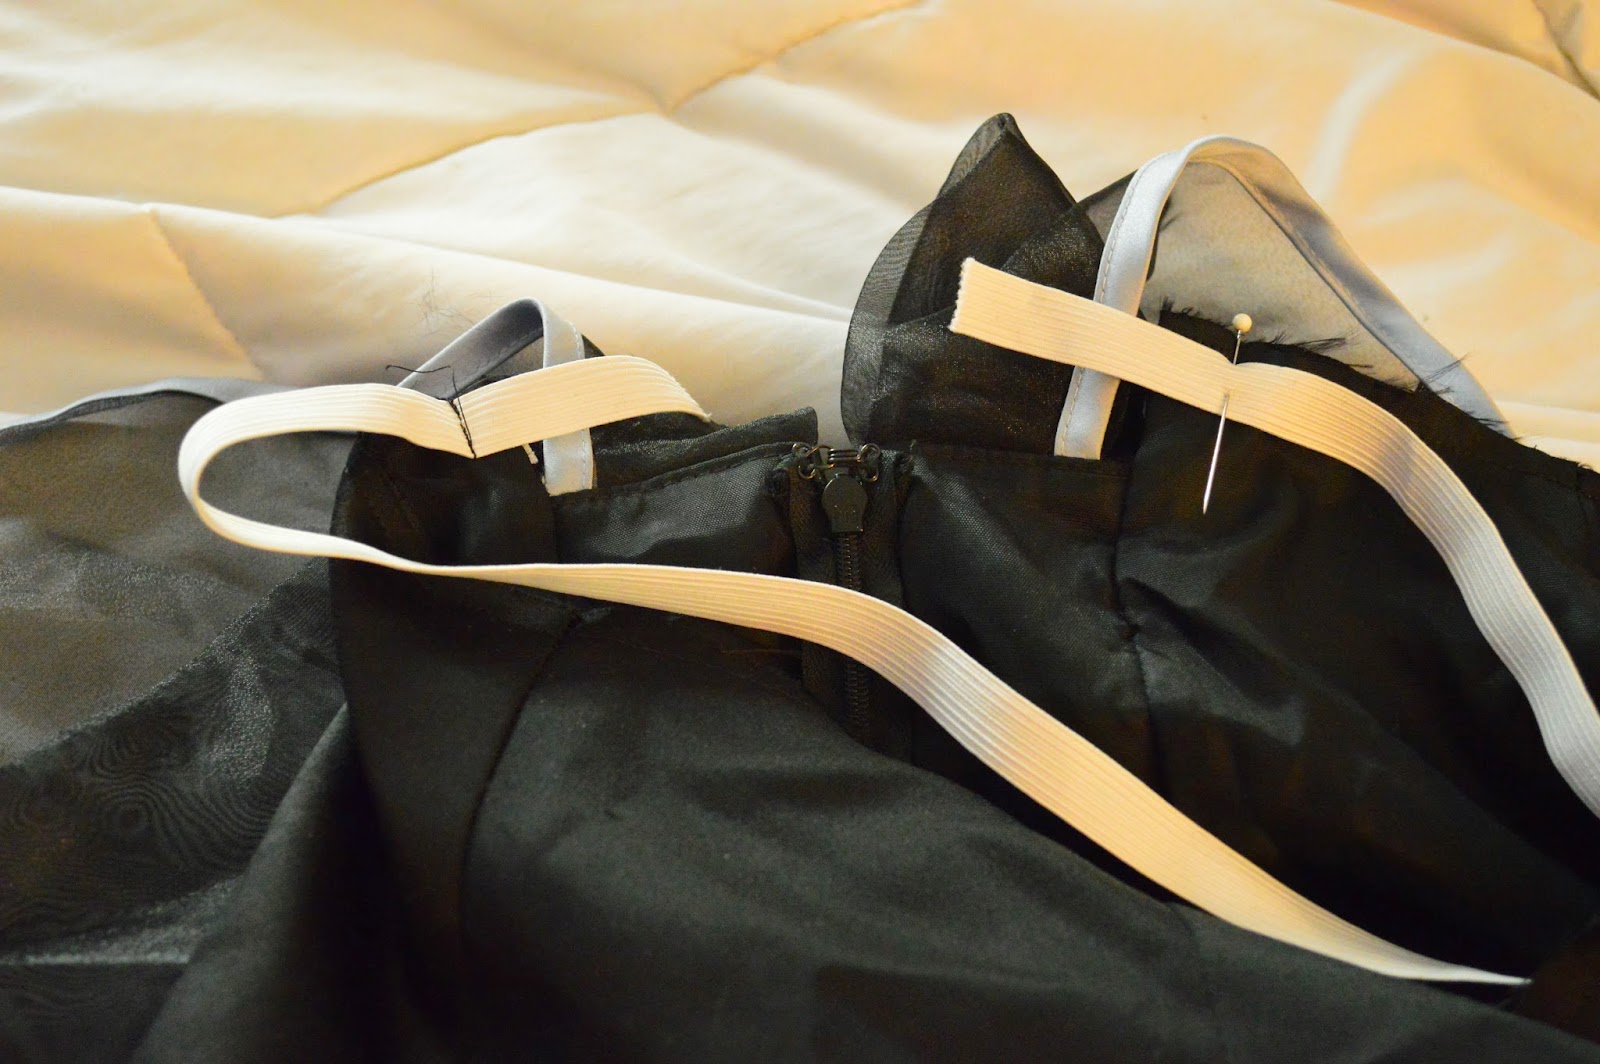
Next I started securing my elastic to the dress. This was kinda tricky because I didn't want the dress to bunch up any in the front, so I pinned the 2 ends of the elastic to the dress and then started pinning around as I went. I made sure the front of the dress laid flat and that all the bunch was going to end up in the back. The tricky part about elastic is that you have to stretch it as you sew.


Ta-Da!! Elastic secured!
After I sewed the elastic in, I folded the excess fabric over and sewed it down to create the waistline.

And that's it! I hope you are able to use this refashion to get some more life out of an old dress that you have floating around.
I'm feeling this skirt is a little plain, so I'm thinking of adding pickups to it to give it a different shape and make it less plain. Stay tuned and happy crafting!

Thursday, October 23, 2014

Earring Refashion: Giving Your Old Earrings New Life

I bought these earrings so long ago that they’re a little tarnished and dingy looking. I really like them but I haven’t worn them in forever because they’re not quite silver colored anymore.  This earring rebirth doesn't require much in the way of work it just takes a while because you have to let your polish dry completely before you move onto the next coat. The end result is totally worth the wait and watching paint dry.


What you need:
  •  Pair of old earrings. I used some plain silver danglies I got from Claire’s like a million years ago.
  • Nail polish (I used 2 colors but feel free to use only 1
  • Clothes pins (to hang your earrings dry)


Step 1 – Starting with your first color (or only color) give your earrings a nice even coat. Make sure you don’t have any spots where the color pools because it will end up lumpy and will take longer to dry. Let sit for about 30 minutes.


Step 2 – Using your first color again, give your earrings another nice even coat. This helps cover any blemishes and also makes the color brighter. Let sit for another 30 minutes


Step 3 – Using your second color (or your only color) give a nice and even final coat. Since the coat of polish is so thick you should let your earrings hang dry for at least an hour so you don’t end up accidentally making indents into the polish.

I’ve got a few more pairs that I’m going to do this to and I hope you were able to find this tutorial/refashion helpful. I’d love to see your finished projects!


Wednesday, October 22, 2014

Cute Dress-- Almost fits!

Don't you hate it when you find a dress at the store for a GREAT price and then it won't fit over your boobs? ME TOO!! Damnit, tatas.

Well guess what? Hate it no more! Just cut the back of the dress open and add a long triangle of lace. You can add about six total inches of width across the back of the dress without it being wonky and clumpy.

Here's the dress I found:


For $6.00. Seriously. How could I walk away from this?!

It reminds me of the one Julia Roberts wore to the horse races in Pretty Woman. Big part of my childhood.

I wish I had taken a photo of the back of the dress, but as you can kind of tell at the left, the back had a button closure.

I took the button off and folded the closing ends over, then sewed them down to make a V. I added a triangle of lace, measured from the top of the back neckline to the waist, skinny side down.

A zip zip at the sewing machine, a couple quick alterations, a strip of lace as a belt, and BLAMO!


<3 Bethany