Friday, May 30, 2014

Hot Glue Ribbon Rosette Tutorial


Before we begin, I’d like to offer a small disclaimer: This is not necessarily the best way for everyone to make ribbon rosettes. I have found that there are other ways that fit different learning styles and yield beautiful rosettes. This is just the way I do it, and it has been quite successful for me.
Once you get the hang of it, you will be able to do a rosette in just a couple of minutes. The issue is less understanding the process, and more making your fingers do what your brain wants them to do.
So, to begin… Here’s what you don’t want to do-
1)    Don’t squish it. It’s not going to run away from you.
2)    Don’t be afraid to hold it firmly. It isn’t going to break.
3)    The ribbon doesn’t need to be pulled as tight as humanly possible, but don’t leave slack.
Here’s what you should do-
1)    Start with a cut of ribbon. Any length over 18” will do. The longer the cut of ribbon, the larger the rosette will be. As it gets bigger, it does get more difficult and you may need to pause and glue the back before continuing to twist.
I used 7/8” ribbon for this tutorial. My favorite to use is ¼” or 3/8” for the look, but any size will work. You can use grosgrain, but I would recommend satin.

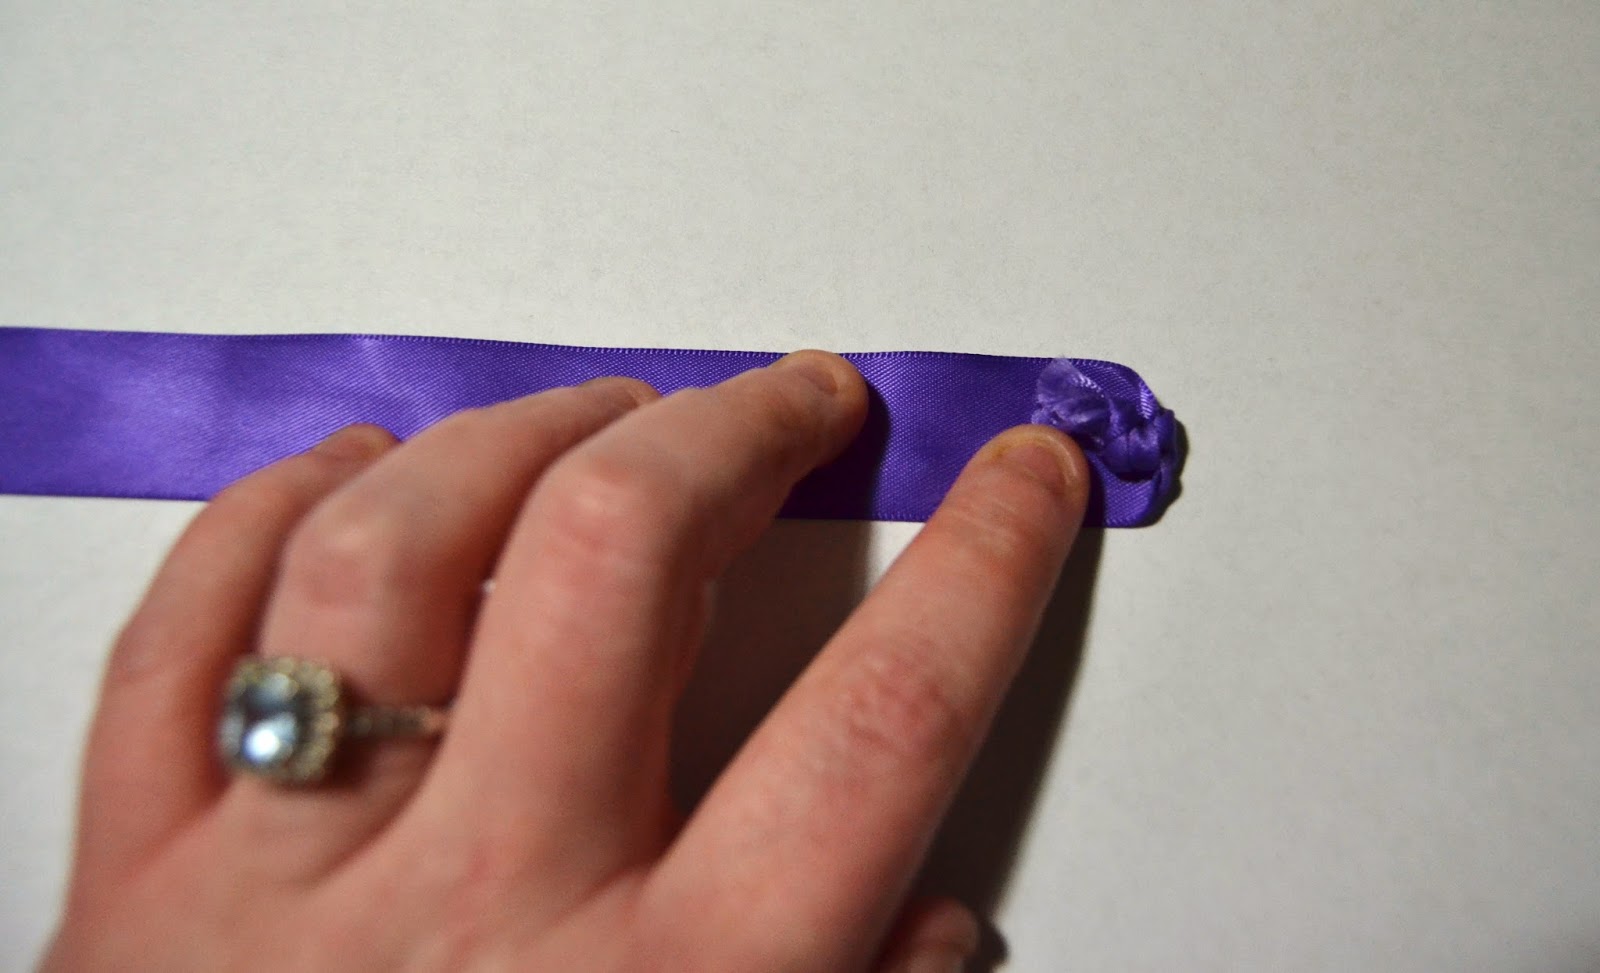
2)    Tie a knot in the end of the ribbon. Try to tie it with little excess, or just cut off the end.

3)    Tuck the knot into the ribbon and roll around it. If you’re holding the knot in your left hand and wrap the ribbon around it to the right (clockwise) with the right side of the ribbon out, it should look like this:

One full wrap-around with the ribbon should be enough.
4)    Hold the ribbon taught from the knot. Follow the top line of your ribbon (whichever side you have up is the top) and see where it is starting to make a strong angle. Instead of going horizontally away from the knot, the ribbon should make a slight upward slant. Where the slant starts, fold the ribbon towards yourself (away from the knot) until the ribbon makes a horizontal line from the knot.

Then, when the ribbon starts to make a slant away from horizontal again, fold it the same way. Continue this over and over and over until you reach the end of the ribbon.


5)    Fold the end of the ribbon towards the underside of the rosette.

Glue the edge down and run the glue gun around the bottom of the rosette, getting glue into all the crevices between the layers of ribbon. Let it dry.
Yes, I bite my nails. No, not while I'm working.

That should be it! Here’s what the top and bottom of your rosette should look like:


Use it on whatever types of projects you’d like! Rings, earring studs, hair pins, brooches… The sky is the limit!

Thursday, May 29, 2014

My Favorite FREE Learning Apps for Toddlers on Android


We live in a society where you can’t get away from technology. It’s everywhere and trying to limit screen time for your children is almost impossible when there are TVs and computers everywhere. Instead of limiting screen time, find more educational programs and games for your kids. Be aware that since these are free apps, they’ll probably come with advertisements. A good way to avoid having your child buy things with your phone is to put it on airplane mode. The downside is that you won’t receive any calls or texts but it saves your wallet and your phone bill. Plus the apps won’t be able to access the network and use up your data on unwanted ads.


I’ve come across a company that makes apps for Android that are not only fun, but educational as well. I find that the more fun J has, the more he learns without realizing it. This company, Intellijoy, has developed a handful of learning games that are interactive and fun. My son really likes Kids ABC Learning Trains Lite. Since it’s the lite version you only get 2 activities within the game but it’s still fun and they’re still learning their alphabet. One of the activities is using the train to trace the letters on the track and the other is connecting the dots between each of the letter train stations. They’re both a lot of repetition and they say the alphabet out loud to help your little one register the letter and what it looks like. Another one that J likes is the Kids Reading Sight Words Lite. It’s this little tadpole in a tank and you have to match the words in the pitchers above the tank with the word they’re saying. After each correct match, the pitcher adds water to the tank until the tadpole turns into a frog and takes you to another screen where you play the matching game again but you have to match the word twice in this level. We’ve sampled all of Intellijoy’s games and those two are the ones that my son would always go to first and play the longest.


Another fun learning app is Alphabugs: Super Fun Alphabets by Lazy Androids. The object of the game is to keep the letter filled in before time runs out while battling bugs who want to eat what you’ve colored in. The only problem is that J doesn’t just color the letter, he colors the entire page and yells “Oh no!” while squishing bugs so he’s never actually beat a level. Not that it matters because he is learning and it keeps him happily occupied.


The first app I ever downloaded for him is called Toddler Lock by Marco Nelissen. The cool part about this app is that it locks your phone when it’s activated so your child can’t get out of the app without touching each corner going clockwise. Toddler lock lets them draw on the screen in bright colors or if they just tap the screen it brings up bright and colorful shapes while making a wind-chime noise in the background. When J was smaller, that app would keep him occupied for a long time.


Sprout Games and Videos by Sprout is another great app. It has free episodes of your child’s favorite shows on Sprout as well as their favorite songs that can be heard on Sprout. The games section keeps expanding as new shows come onto the station. J likes to color in the scribbler and I just noticed that they’ve added new activities such as tic-tac-toe, mazes and connect the dots. The only downside of this app is that it uses data to stream so you can’t use this app on airplane mode.


These next few apps are not technically educational but they help your child learn strategy and thinking outside the box.


J’s favorite “non-learning” app is called Cut the Rope by ZeptoLab UK. The reason I put non-learning in quotes is that this game is a thinking game all about puzzles and strategy. It teaches kids problem solving while having fun at the same time. I call this “subliminal learning”. The object of the game is to get the piece of candy into the frog-looking guy, Om-Nom’s mouth by cutting the ropes in strategic order. I have a heck of a time with this game, but J can whip through levels. There are 4 different versions of this game and each game has 20+ levels so they won’t get bored with it fast. All of the levels are free on your Android phone, but only certain levels are available on IOS.


Another app J really likes is Angry Birds by Rovio. This is another strategy game because you have to fire these birds with your slingshot at different structures to squish the Bad Piggies and get your eggs back. Some of these levels are very difficult and you have to fire your birds at the right spot to get everything to crash down and squish those piggies. There are 8 different versions of the game with the newest one being a racing game called Angry Birds Go!. These apps are perfect for long car ride because there are so many different levels in each game for them to choose from, they won’t get bored being stuck on one level.


I hope you enjoy these awesome apps!

Monday, May 26, 2014

Simple Summer Face Tutorial- Base Make Up

Simple Summer Face Tutorial:

-Products- What I used in this tutorial.

1) Beauty blender. Can be found at Ulta, but has a similar version at CVS. (makeup wedges work as well)

2) Primer. I'm using Rimmel Londons Stay Matte Primer.

3) Pore eraser. Maybelline Baby Skin Instant Pore Eraser.

4) Concealer. Sonia Kashuk Concealer pallet.

5) Concealer stick. Maybelline Instant Age Rewind

6) B.B Cream. Nyx B.B cream in Natural

7)Setting powder. Rimmel Londons Stay Matte Pressed Powder

8) Eyebrows. Gimme Brow by Benefit Cosmetics

9) Blush. Terra Cotta by NYX


Let's get started with the tutorial!

1) FRESH FACE~ The first thing you want to do is start out with a clean, fresh face! This is going to give you a great surface to work with and your makeup will go on much easier when your face is clean!


2) PRIMER~ Using a primer before applying your makeup is going to give it something to stick to so it won't move or slide off your face in the heat! Cause it's never any fun to have your face melt off! (JK) I apply my primer with my fingers, but I ALWAYS make sure my hands are clean! Transferring any nastiness that we have on our hands is not good for our face. So think before you prime!


3)PORE ERASER~ This step is optional, but if you have big pores like me, then just read on! Using an instant pore eraser does exactly what it says it does. It erases your pores. Not completely of course, but it makes it look that way!


4)UNDER EYE CONCEALER~ This next step is always a must for me. If you want to skip this step, you can, but I prefer to always add it in when "putting on my face." Hide those dark circles ladies! YES! Such a pain, but a part of life. I just simply apply the concealer in a triangular shape under my eyes and BLEND, BLEND, BLEND!


5)CONCEALER~ So, this step is for those of us that have those horrible face-demons! The best way for me to cover one of those bad boys is to use a green toned concealer. The green is going to block out the redness of the blemish. Remember to blend well!


6) B.B CREAM~ I love using a B.B cream in the summer cause it feels so much lighter on your face than a heavy liquid foundation does. So, when applying my B.B cream, I use my Real Techniques sponge. This thing is amazing! You get it damp and it feels so good on your face! Anyway, just dot some of the product onto your face and blend it slightly into your hairline and down onto your neck so it gives you seamless, gorgeous face!


7) Setting Powder~ Setting powder is optional. If you have oily skin like I do occasionally, then I suggest using a setting powder. It's going to keep your face from getting oily throughout the day and it's obviously going to 'set' your makeup. Just use a big fluffy brush to apply the product and be sure to lightly dust all over your face.


8) Brows~ Brows are super important. Keeping your brows groomed and looking FINE will bring a lifted look to your face and it'll make it easier to fill them in. If you want to invest in anything makeup related, I highly suggest the 'Gimme Brow' from Benefit Cosmetics. It's so simple to use and it works amazingly! If not, then they have brow powders that you can get at your local drug store that will work just fine. Be sure to match your color properly. It doesn't have to be exact. My brows are lighter than my hair color, but that way, it makes it look a little more natural.


9) Blush~ Using blush is a great way to lighten up your face. Just take a blush brush or whatever brush your prefer, pick up some product and tap off the excess. This is important! You want a natural glow on your cheeks and you want it to look natural. You simply sweep the brush along the apples of your cheeks and blend upward onto your cheek bones. Use a light hand when applying.


That's the finished look ladies! The final step is to admire that glowy skin of yours cause girl, you are FIERCE! I hope you guys enjoyed this makeup tutorial and there's going to be more so keep reading! 
                                                XOXO, Kate


Friday, May 23, 2014

Lace Appliqué Shirt Tutorial


So this isn’t so much of a tutorial is it is an idea. It’s pretty simple to do… I’ll tell you in three steps:


1)    Get a lace appliqué. I got mine on Ebay for a really good price. Get a shirt to go with the appliqué you choose.
2)    Pin and hand-stitch the appliqué into place on the shirt.
3)    Cut the shirt from behind the appliqué (carefully).
Here’s what I got from the second-hand store in town. It was also too big, so I took in the elastic a bit to make it more fitted.

I chose this beautiful white peacock appliqué, pinned it into place, and sewed it on! Here’s what the back of the shirt looks like now:


It’s that simple! As long as you can pin something into place and hand stitch it, you can do this DIY!

Thursday, May 22, 2014

The Life of a Working Mom


I’m not going to lie, it wasn’t always my dream to be a mom. It was my sister’s dream to have a bunch of kids and be a fun stay-at-home mom while I wanted to go out and see the world. Who wouldn’t want to be a free-spirit and roam the earth seeing everything that nature and man have created.


When I found out I was pregnant with my son I was blown away. I remember staring at the digital screen on the pregnancy test willing the “not” to show up on the screen. I wasn’t ready to be a mom. I was unmarried and living with my grandma at the time and helping her while she healed from her knee-replacement surgery. I dreaded having to make the phone call to my boyfriend (now husband). He could tell something was wrong just by my tone of voice when he answered, so I just blurted it out. “I’m pregnant” and was instantly in tears. He immediately starts laughing this joyful belly-laugh that I had never heard out of him before. I was so confused! I thought he was going to be angry and start yelling but I never expected laughter. Boy, was the weight lifted off my shoulders. Telling the rest of the family was a piece of cake after that. I’m not sure why I expected the worst out of him and the rest of my family, but they were all so excited at the news of a new person coming into the family. My mom was finally going to be a grandma!


Pregnancy was pretty much a piece of cake (besides gaining almost 70lbs) and labor was better than expected. At some point I remember telling the nurse that I thought I was going to die and she patted my shoulder and said “I haven’t lost one yet and I’m not about to lose you, do you want me to call the anesthesiologist?” I was so disappointed in myself that I answered “yes”. I wanted to have this beautiful, unmedicated birth with candles and peaceful music in the background (CRAZY fantasy, right?). I felt like I was letting myself down. I didn’t want to be a wimp, I wanted to be tough and push that baby out without any drugs. My body had other ideas. I was just so exhausted that if I didn’t get the epidural, I wouldn’t have had the strength to push. As soon as I was numb, I drifted off into this nice, peaceful sleep and woke up to sunlight streaming into my room and the nurse and doctor hovering over me asking me if I was ready to meet my son.


The rest of that day was a whirlwind of Drs, nurses and visitors. My little guy had inhaled some of his amniotic fluid so we were sent up to the NICU (Neo-natal Intensive Care Unit) for a week of antibiotics and observation.


After that, I had a week until I had to go back to work. Yes, I only had a 2-week maternity leave. The main reason was because I wasn’t getting paid for my time off and my husband wasn’t working at the time. Somebody had to pay the bills. Do I regret going back to work so early? Yes and no. I think getting out of the house helped me not get postpartum depression, but I had such a hard time with breastfeeding. My boss was a man who didn’t understand anything about motherhood and was always cracking jokes about my boobs and the milk in the freezer. It was very awkward and uncomfortable for me. I had to move from office to office to pump because they wouldn’t designate a place for me. When I got laid-off it was a blessing in disguise. The only sad thing was that my baby was already 1. I had already missed out on first steps, first time crawling, first words, etc.


Since my husband was working part-time, I was able to stay home and collect unemployment but we soon found that it wasn’t cutting it and I had to go back to work. Don’t get me wrong, I love my job but I miss being at home with my little guy, which is one of the reasons I started BeeBee and Jack. I want to be able to work from home so I can spend time with my son and do things that I love to do while getting paid for it. Who wouldn’t want that?


Monday, May 19, 2014

Meet Kate- The Gangstress of Hair and Make Up

Hey everybody! My name is Kate-Lynne, but I prefer Kate cause it doesn't sound so formal and stuffy. So a little bit about me! I'm 21 and I'm currently getting my insurance license. Soon after, I will begin my journey towards a paralegal certificate.

I have 2 very important men in my life and they are..... MY DOGS! (Or fur-babies, if you will). Carter is my almost 6 year old Corgi and Jr is my 3 year old weenie dog. I love them both so much and they're wonderful dogs. Something interesting about Carter is he knows sign language! He knows sit and.... that's it. But that's pretty impressive if you ask me. Yes, I'm a proud fur momma!


My passion is makeup. I started watching YouTube videos for fun and to get tips on hair and makeup. Well, it's now become my addiction. I'm always coming up with different makeup looks and trying out different products.
 
My makeup collection grows almost every week and that's probably why I'm broke all the time! But anyway, in my guest blog posts, I'll be doing simple makeup tutorials, tips, and tricks on somethings that you guys might struggle with. I might just add in a hair tutorial or two!


I really hope you all enjoy what I can share with you and that it benefits you in positive way and makes you feel beautiful. Looking good on the outside can make you feel like a million bucks on the inside! So, with that said, I'm extremely excited to be sharing some of my makeup tips and tricks with you gorgeous beauties!


ENJOY!                    

XOXO, Kate